Most poor images come from the machine settings, not the patient. Run these five checks before you start looking for pathology.
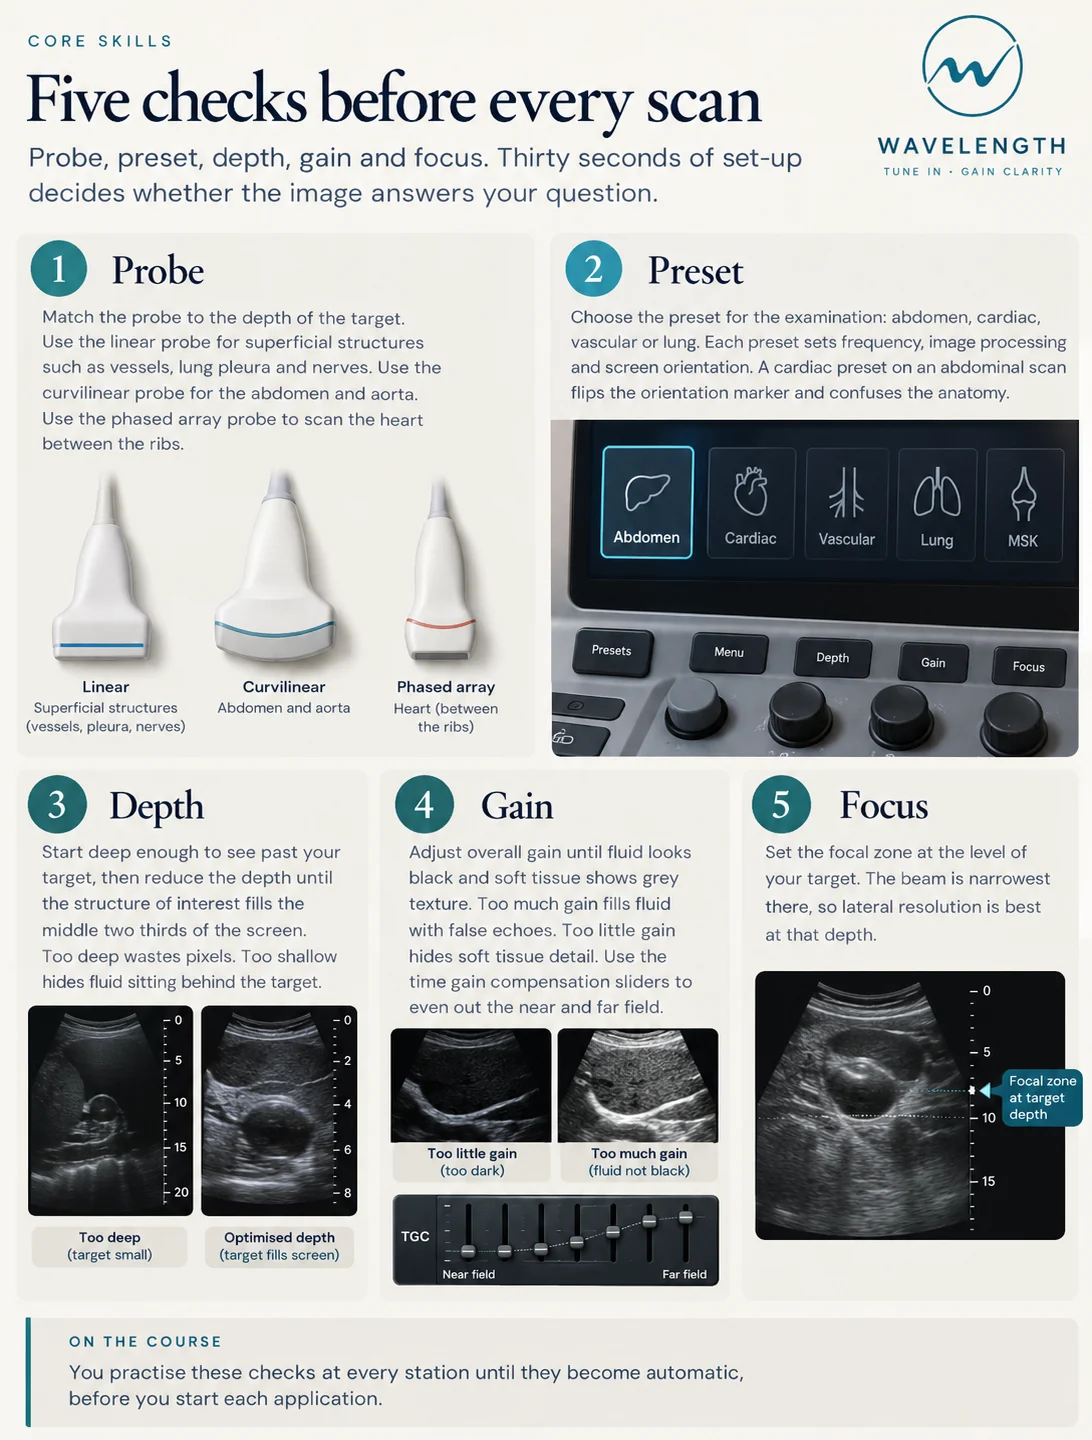
Scan images in the graphic are illustrations, not patient scans.
1. Probe
Match the probe to the depth of the target. Use the linear probe for superficial structures such as vessels, lung pleura and nerves. Use the curvilinear probe for the abdomen and aorta. Use the phased array probe to scan the heart between the ribs.
2. Preset
Choose the preset for the examination: abdomen, cardiac, vascular or lung. Each preset sets frequency, image processing and screen orientation. A cardiac preset on an abdominal scan flips the orientation marker and confuses the anatomy.
3. Depth
Start deep enough to see past your target, then reduce the depth until the structure of interest fills the middle two thirds of the screen. Too deep wastes pixels. Too shallow hides fluid sitting behind the target.
4. Gain
Adjust overall gain until fluid looks black and soft tissue shows grey texture. Too much gain fills fluid with false echoes. Too little gain hides soft tissue detail. Use the time gain compensation sliders to even out the near and far field.
5. Focus
Set the focal zone at the level of your target. The beam is narrowest there, so lateral resolution is best at that depth.